SEWING A SKIRT WITH PLEATED FABRIC

Pleated fabric is back in fashion and we can show you how to sew yourselves one.
Its a classic timeless fashion piece, the wonderful pleated skirt made of pleated fabric. How often have you held pleated material in your hand and put it back again because you didn’t dare to sew it? Today will be the end of that. I’ll show you how to sew yourself your very own pleated skirt.
THINGS TO KNOW ABOUT PLEATED FABRIC
A fold in the pleated fabric consists of a width and a depth measurement.
Pleat width: The part visible from the outside between the folds.
Pleat depth: The inner part (2 x fold width)
SEWING PATTERN
When it comes to pleated fabrics, the motto is: the simpler the better. The midi skirt is best for your first pleated sewing project. For the pleated skirt, add 3 – 4 cm to the width of your hip measurement. No more, because too many wrinkles will appear when finished.
CUTTING
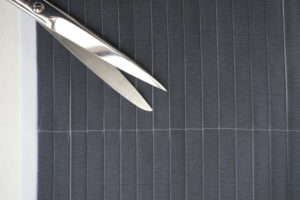
The pleated folds are incredibly tricky to cut, as they constantly move whilst on the cutting table. If you don’t have a large table, cut the pleated fabric on the floor. A carpet or a linen tablecloth is also an excellent base that prevents movement. Make sure that the small folds are nice and close to each other before cutting.
The be-all and end-all of cutting pleated fabrics is a straight cut edge. So that it works without any problems, this is why we suggest pulling out a cross thread. That means: cut the fabric on the side and carefully pull out the thread that runs at right angles to the side edge ( selvedge). The best way to do this is to hold the fine cross thread in your hand and push the fabric as you would when gathering. Pulling out the cross thread creates a recognizable line that you cut along, that is perfectly straight.
SIDE SEAMS
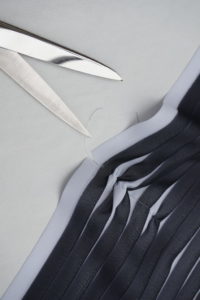
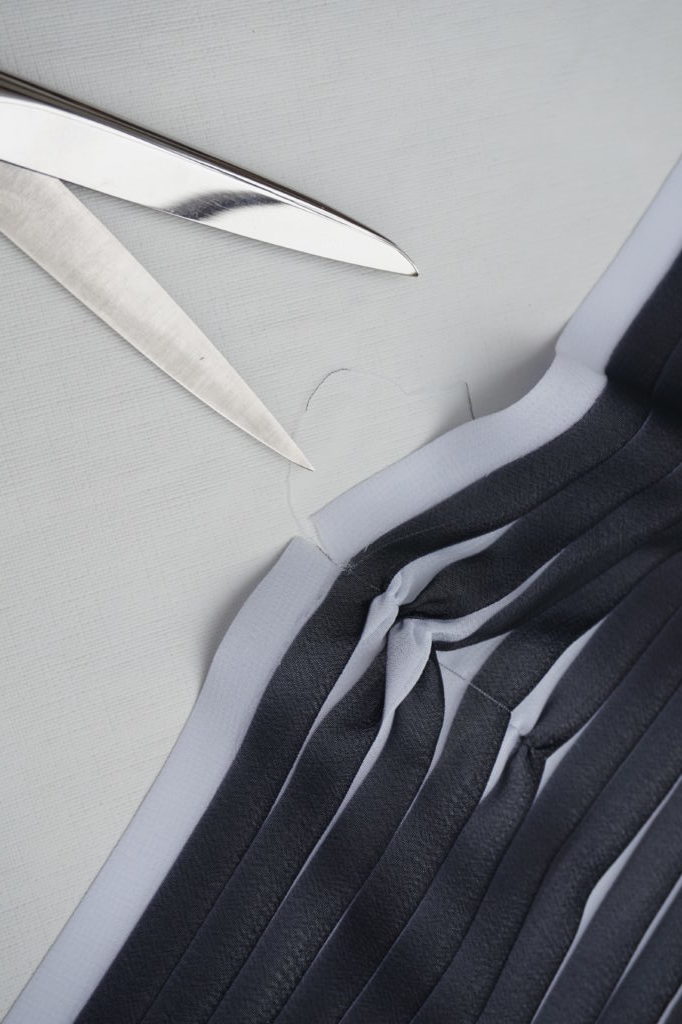
Cut your side seam along the fold edge of a top fold. The cut on the other side is made on the fold edge lying below.
Even if you don’t like to sew by hand, for the perfect end result you have to connect the side seams with loose basting stitches before using a sewing machine to hold the seam in place. When sewing the fabric panels together, stitch the fabric edges onto one another in the inner fold of the fold. This way, the side seams remain invisible.
Hem
Do you have an overlock machine? Then you can sew the hem wonderfully with a rolled hem.
No overlock at hand? Pull the folds apart, fold the lower fabric edge of the skirt two times and first secure the hem with your hand with loose basting stitches. Once the hem has been prepared, you can topstitch it with the sewing machine. If the folds of the fabric have puckered, you can iron them and get them back into shape.
THE ELASTIC BAND
A rubber band is a great invention, isn’t it? There are so many beautiful, decorative, wide elastic bands (with glitter and jacquard designs!) That are perfect for your pleated skirt.
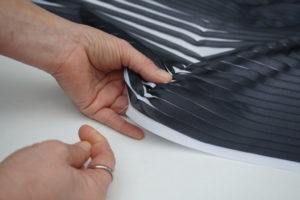
Be careful with the waistband that the folds stay together nicely. Lay your fabric flat on the table and pin the folds in place. If you want to exercise patience! You can pin every single fold with a pin or secure it with a basting seam by hand.
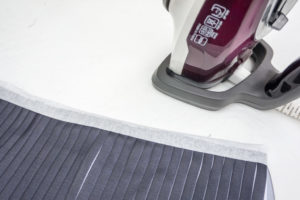
FIX THE FOLDS WITH FIXING EMBROIDERY FLEEC
You can also fix the folds on the upper edge with a stabilizer. You can use the fleece for stretchy fabrics. Simply iron on and topstitch. This will avoid wavy seams. The fleece can be easily removed
- Sew the elastic band together to form a ring, divide it into four pieces and mark these places with pins. ( CF, CB and side seams)
- Cut the fleece into narrow strips and carefully iron them onto the fabric.
So that the elastic is stretched evenly, mark the centre on the front and back of the skirt. Put the rubber band on the upper edge of the skirt so that the marked points are exactly on top of each other. This method adds control as the distances from the pins is smaller
Sew the elastic to the edge of the fabric with a zigzag or overlock stitch on your sewing machine. The stitch must remain stretchy and at the same time covering and securing the fabric edge.
Now just remove the fleece holding the pleats and the new pleated skirt is ready.
Sewing a pleated skirt yourself may not be that easy, but I have to say: the effort was worth it. Have you ever used a pleated fabric? Share your experiences with us and post your photo on Instagram. Link us with @hemmersitex or our hashtag #diyhemmers.